![Insights_horiz-1.png]](https://support.elumenconnect.com/hs-fs/hubfs/Insights_horiz-1.png?height=40&name=Insights_horiz-1.png)
Generating Your Report
Step 1: Access the Generate Report Option
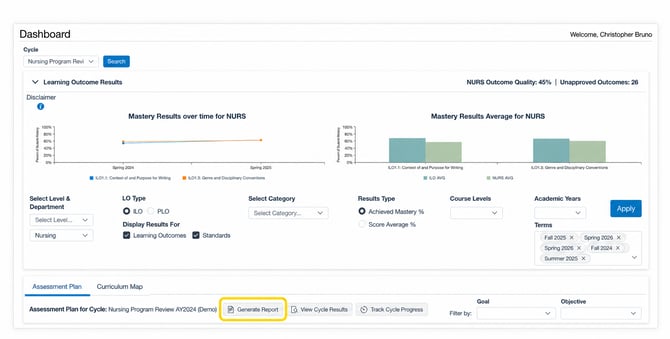 Coordinators can select Generate Report next to View Cycle Results on the Assessment Plan tab of the Dashboard.
Step 2: Review the Generated Report
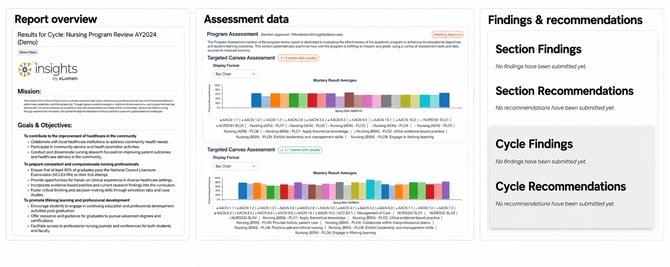 The generated view removes all side and top navigation elements to produce a clean, professional document—suitable for sharing with colleagues, administrators, or accreditation bodies.
Adding a Header Image
Both assessment plans and assessment plan templates support an optional Header field that allows Assessment Coordinators (ACs) and Program Coordinators (PCs) to include an institutional logo or banner at the top of the report.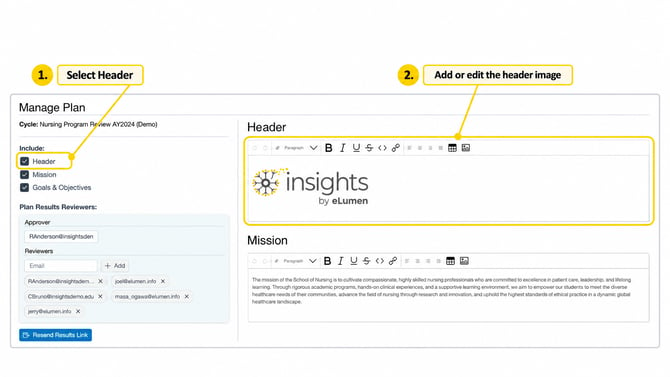 Creating a Plan with a Header Image
- Navigate to Plan > Assessment Plan or the plan creation flow
- Locate the Header field (optional, rich text editor)
- Upload or paste your institutional logo or banner image
- Save your plan
Adding a Header to a Template
- Navigate to Setup > Plan Templates
- Create or edit a template
- Complete the Header (optional) rich text editor field
- Save your template
Automatic Header Inheritance
When a plan is created from a template that already contains a header image, the image carries over automatically to the new plan—ensuring consistent branding across all reports.
How the Header Appears in Reports
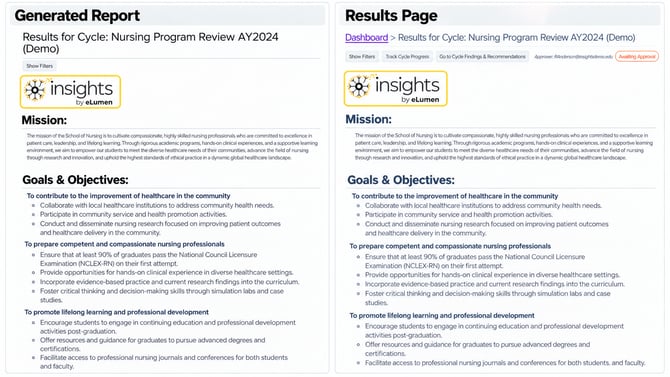
The header image appears at the top of the report in both:
- The Generate Report view (navigation-free)
- The Published results page (navigation-free)
This gives your document a polished, institution-branded appearance.
Before Generating the Final Report
Before generating the final report, confirm the following are complete and accurate:
☐ Reviewer input has been submitted
☐ Approver sign-off has been completed
☐ Measure evidence has been attached
☐ Filter choices reflect the intended data view
☐ Dashboard access is configured appropriately
☐ Findings and recommendations are clearly and accurately worded
✅ Best Practices
✅ Add the header image during plan or template creation rather than at the reporting stage, so it is consistently applied across every report generated from that plan or template.
✅ Use a high-resolution version of your institution's logo or banner to ensure a professional appearance in both on-screen and printed reports.
✅ Set the header at the template level when multiple plans share the same branding, so all coordinators working from that template inherit a uniform header automatically.
✅ Generate a report mid-cycle to share progress with stakeholders before finalization—this enables early feedback and reduces last-minute revisions.
✅ Preview the generated report in a browser before printing or distributing to confirm the layout, header image, and content display correctly without navigation elements.
✅ Confirm all reviewers and approvers have completed their tasks before generating the final report, so the document reflects complete, authorized data.
✅ Use consistent header images across all plans within a department or institution to maintain a uniform, professional brand identity across all shared reports.